Español abajo
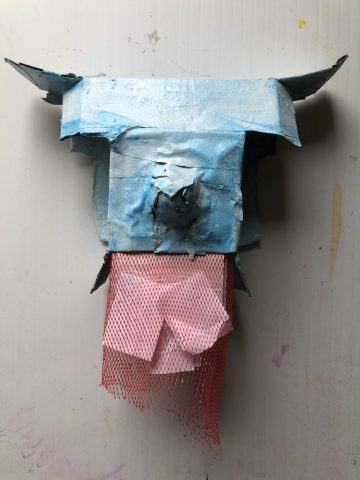
Jeffrey Cook was an artist that took everyday objects and refuse and transformed them into new, layered, and complex pieces of art. In Vanessa’s Secrets, Cook frames an interior rectangle, a journal, mummified in pink. Use this lesson to guide 2-8 grade students into making their own Paper Mache sculpture of secret thoughts and feelings.
Download Activity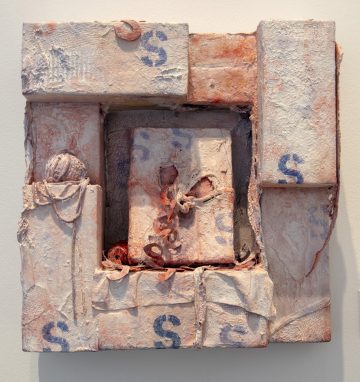
Jeffrey Cook, Vanessa’s Secrets, 1999-2001, Mixed media, 2003.89.1 / Jeffrey Cook, Los Secretos de Vanessa, 1999-2001, Técnica mixta, 2003.89.1
Notable for his found-object sculptures, Jeffrey Cook was a New Orleans-born artist who focused on nurturing a sense of space. After graduating from Xavier University – where he studied under the legendary artist John T. Scott – Cook became a professional dancer and traveled the world. Returning to New Orleans in the mid-‘80s, Cook established a studio in Central City and began to tell the tale of the neighborhood’s rise and fall with its debris and forgotten artifacts. Cook fused disparate, unrelated objects together to produce a sculpture completely distinct from its individual parts yet obviously borne from them. Some of Cook’s assemblages resemble a human or other recognizable form while others are more indefinite. His work inherently represents certain spaces as much as the street or buildings would; they are of the place.
SUPPLIES
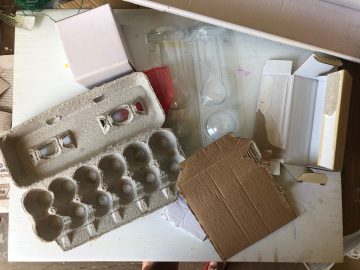
- Old cardboard boxes and scraps
- Lightweight found objects around the house or yard
- Newspaper
- Water
- Bucket or deep pan
- Liquid glue if you have it
- Scissors
- Pencil or pen
- Paint of any kind or markers
- Recycled paper from printer or other sources from around your home
- A flat table area where you can work on a covered surface (plastic tablecloth, plastic trash bag on top, etc.)
- Masking tape
- Optional glue gun and glue sticks
PROCESS
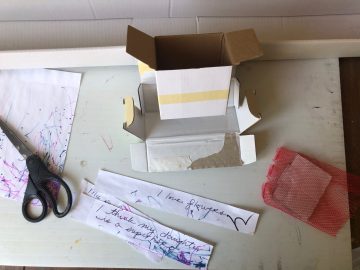
- Ask students to take a few moments to sit comfortably with their eyes closed and take a few deep breaths. Ask them to think about three things that they deeply love and cherish. Have students write down at least three of their loves on three separate scraps of paper. These scraps will be integrated into their artwork later.
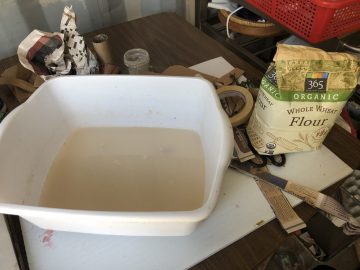
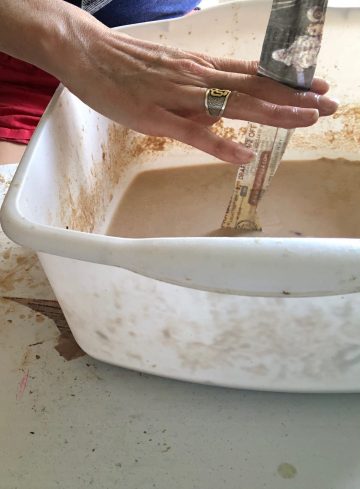
- Now have students prepare the paper mache. Mix 1 cup flour with ¼ cup white glue, and then slowly pour in about 1 ½ cups of water. Mix well to get out all the little clumps. Put the mixture to the side.
- For the next step, have students begin to play with and organize different pieces of cardboard or found objects with one another. Arranging these objects until they find a composition they are happy with.
- Ask students to attach the separate pieces of materials together using masking tape or hot glue (with the supervision of a parent or elder of course).
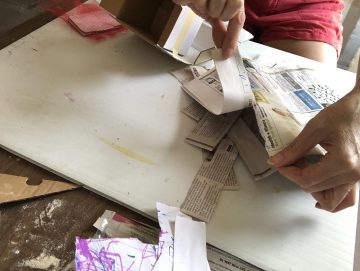
- Once all of the pieces are securely attached to one another, have students rip strips of old printer paper or newspaper into strips.
- Students then dip in one strip at a time to the paper mache, use their pointer and middle finger to pull off excess and then apply it to their form.
- When students have covered the entire object with paper mache, have them go over it and rub down any loose or bunched up edges and corners. Now they can add their secret paper scraps somewhere into the work of art.
- Let the object dry out in the sun for 24 hours.
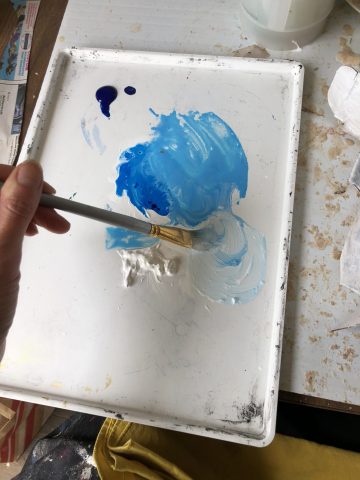
- On day 2 have students paint the object with a light wash, mixing paint with water and white. Set out to dry.
- Have students create a title for their piece and sign and date the artwork on the back.
KEY TERMS
Abstraction is a non-realistic style of art that uses colors, lines and shapes to express emotions and ideas.
Paper Mache a process of using paper or paper pulp and an adhesive like flour or glue to form a structure. A technique invented in China in 200 c.e.
Overlapping the placement of objects over one another in order to create the illusion of depth.
Texture the surface quality of the object
Depth making objects appear closer or farther away and making a two-dimensional image seem three-dimensional.
Found Object is art created from undisguised, but often modified, objects or products that are not normally considered materials from which art is made, often because they already have a non-art function.
________________________________________________________________________
ACTIVIDADES ONLINE DEL MUSEO OGDEN
PARA EL AULA: LOS SECRETOS DE VANESSA (VANESSA’S SECRETS ) | JEFFREY COOK
Jeffrey Cook fue un artista que utilizó objetos cotidianos y desechos y los transformó en nuevas y complejas obras de arte. En “Los Secretos de Vanessa” (Vanessa’s Secrets ), Cook enmarca un rectángulo interior, un diario, momificado en color rosa. Utiliza esta lección para guiar a estudiantes del segundo al octavo grado a realizar su propia escultura con papel maché, que represente sus sentimientos y pensamientos.
Descargar ActividadJeffrey Cook, Vanessa’s Secrets, 1999-2001, Mixed media, 2003.89.1 / Jeffrey Cook, Los Secretos de Vanessa, 1999-2001, Técnica mixta, 2003.89.1
Destacado por sus esculturas con objetos encontrados, Jeffrey Cook fue un artista nacido en Nueva Orleans que se enfocó en promover un sentido del espacio. Luego de graduarse de la Universidad Xavier de Louisiana, donde fue estudiante del legendario artista John T. Scott, Cook se convirtió en bailarín profesional y viajó por el mundo. A mediados de los 80, Cook regresó a Nueva Orleans, fundó un estudio en la ciudad de Central y comenzó a contar la historia del auge y la caída del barrio utilizando escombros y artefactos olvidados. Cook combinó objetos diversos y sin relación alguna entre sí, para crear una escultura completamente distinta a las partes individuales que la componen, aunque visiblemente obtenida de la fusión de dichas partes. Algunos de los ensamblajes de Cook se parecen a una figura humana u a otras formas identificables, y algunas otras son más indefinidas. Su trabajo representa intrínsecamente ciertos espacios tal como lo haría la calle o los edificios: le pertenecen al lugar.
MATERIALES
- Cartones y fragmentos de cajas viejas
- Objetos livianos encontrados en la casa o el jardín
- Diario
- Agua
- Balde o uno sartén profundo
- Pegamento líquido, si tienes
- Tijeras
- Lápiz o lapicera
- Pintura de cualquier tipo o marcadores
- Papel reciclado de la impresora o de cualquier otro lugar de tu casa
- Una mesa lisa donde puedas trabajar sobre una superficie cubierta (con un mantel de plástico, una bolsa plástica, etc)
- Cinta de enmascarar
- Pistola encoladora o barra adhesiva (opcional)
PROCEDIMIENTO
1. Pídele a los alumnos que se tomen unos minutos para sentarse cómodos con los ojos cerrados y
que respiren profundo. Diles que piensen en tres cosas que aman y valoran profundamente y que
escriban al menos tres de esas cosas en tres papeles separados. Estos papeles serán integrados a su obra de arte más tarde.
2. Pídele a los alumnos que tengan el papel maché listo. Mezclen 1 taza de harina con un cuarto de pegamento blanco y luego viertan lentamente aproximadamente una taza y media de agua. Mezclen bien para disolver los pequeños grumos. Reservar la mezcla.
3. Para el próximo paso, pídele a los alumnos que comiencen a jugar y organizar distintos pedazos
de cartón u objetos encontrados. Ordenen estos objetos hasta que encuentren una composición que les guste.
4. Pídele a los estudiantes que peguen estas piezas separadas utilizando cinta de enmascarar o una pistola encoladora (con la supervisión de un padre o un adulto, por supuesto).
5. Luego de que todas las piezas estén pegadas una con otra, pídele a los alumnos que rompan tiras de impresiones viejas papel de diario.
6. Luego, los alumnos deberán mojar una tira de papel maché por vez en pegamento, y utilizar su dedo índice y su dedo mayor para retirar el exceso y luego aplicarlo a su forma.
7. Una vez que los alumnos hayan cubierto el objeto con papel maché, pídele que estiren la superficie para alisar cualquier pliegue en los bordes. Luego pueden agregar sus tiras de papel secreto en cualquier parte de la obra de arte.
8. Dejar que el objeto se seque al sol por 24 horas.
9. Al siguiente día, pídele a los alumnos que pinten el objeto con un tono suave, mezclando la pintura con agua y con pintura blanca. Dejar secar.
10. Haz que los alumnos piensen en un título para su obra, lo firmen y le pongan la fecha en la parte de atrás.
TÉRMINOS IMPORTANTES
Abstracción: es un estilo de arte no realista que utiliza colores, líneas y formas para expresar emociones e ideas
Papel maché: es un proceso a través del cual se utiliza papel o pulpa de papel y un adhesivo como harina o pegamento para formar una estructura. Es una técnica inventada en China EC
Superposición: el posicionamiento de objetos por encima de otro para crear la ilusión de profundidad
Textura: la calidad de la superficie del objeto
Profundidad: hacer que los objetos parezcan estar más cerca o más lejos y que una imagen de dos dimensione parezca tridimensional
Objeto encontrado: arte creado de elementos cotidianos pero modificados o elementos que comúnmente no son considerados materiales para hacer arte, debido a que tienen una función no artística