Español abajo
Create a colorful pinwheel like David Butler.
Download Activity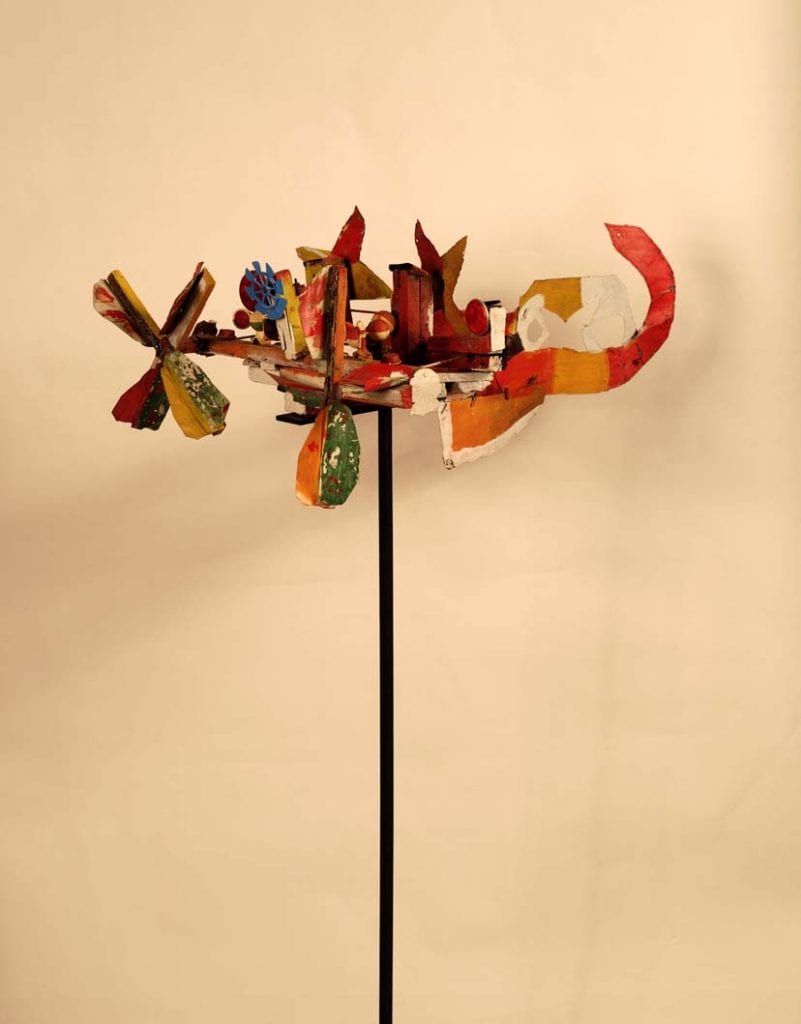
David Butler, Airplane (Whirligig), Mixed media, 1969.
David Butler was born in Good Hope, LA 1898-died Morgan City, LA 1997. He was an African American sculptor and painter. His style is epitomized by kinetic sculptures made from recycled tin or wood, which he embellished with saturated colors and geometric patterns. In addition to incorporating Christian beliefs and folk practices into his artwork, Butler also worked to bring these beliefs and practices into physical spaces to create an atmosphere of self-determination and protection in a world that was often harsh and unpredictable.
Supplies
Color paper, Plastic straws, Paper pin fastener, Scissors, Pencils, Single hole-puncher
Instructions
Note: Complete this activity with the help of a parent or guardian as some of the steps involved need adult supervision.
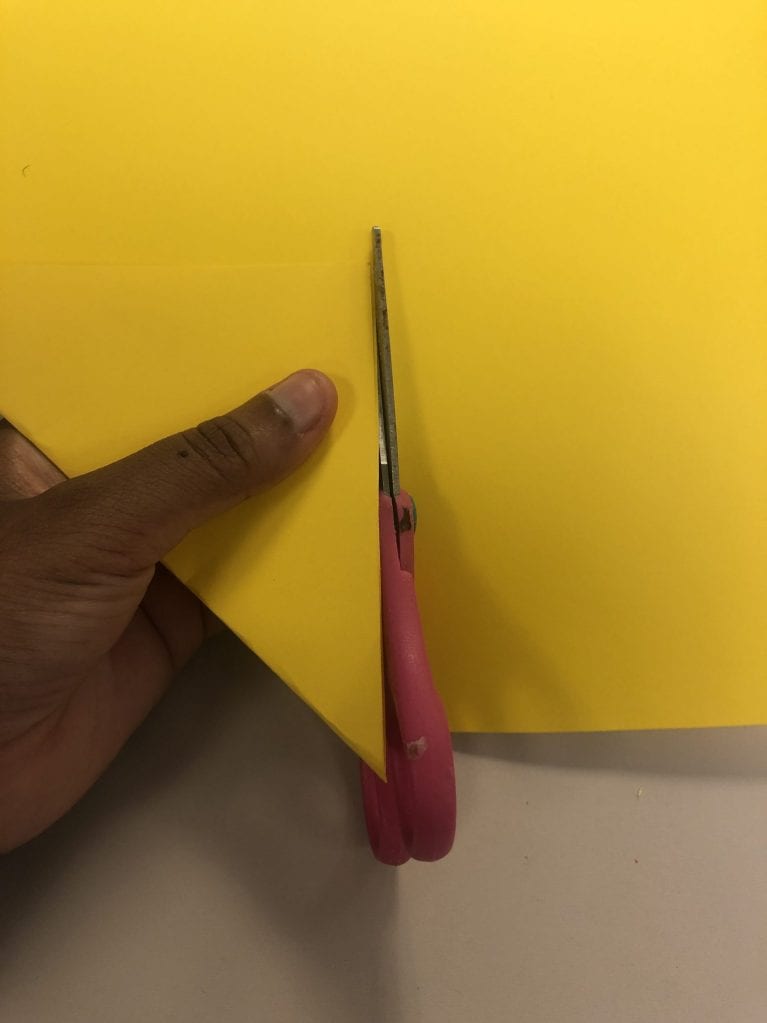
Step 1: Choose what color paper you would like to use to create your pinwheel. Think about how those colors would look if you spin them. Will the two colors blend together to make a third color when spinning? Once you choose the colors, fold one corner of the paper(s) to form a triangle.
Step 2: Grab a pair of scissors and cut along the edges of the triangle, but DO NOT unfold the triangle after cutting it out.
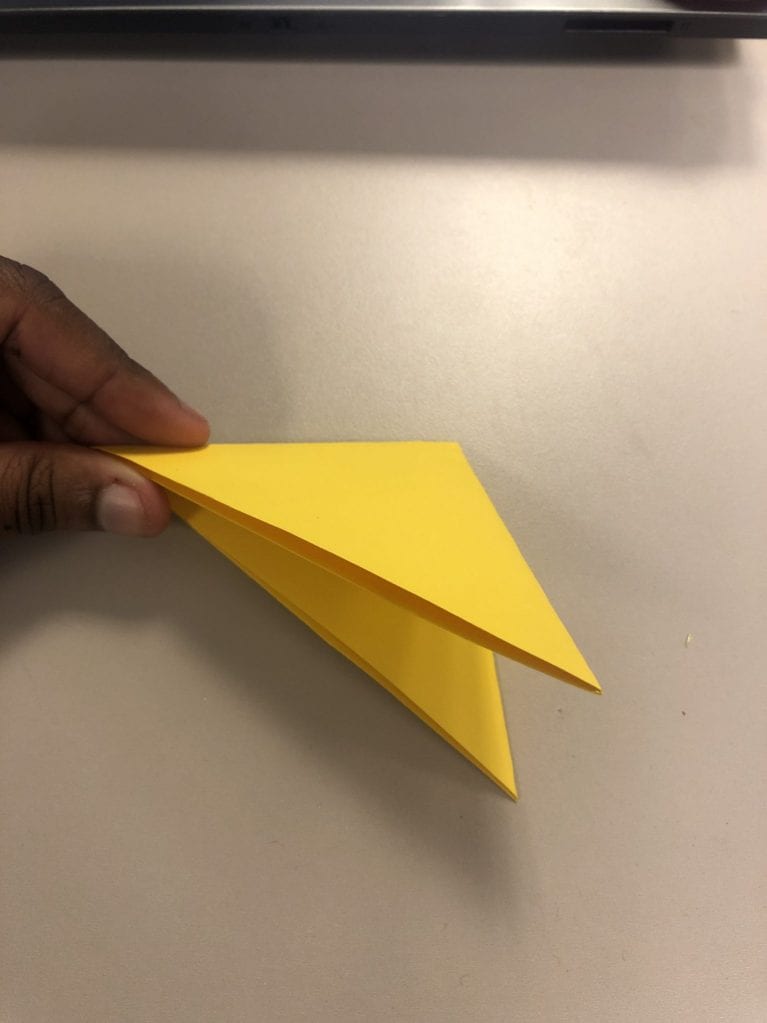
Step 3: After cutting out the triangle, fold that triangle in half to create a fold line. So you should have 2 fold lines.
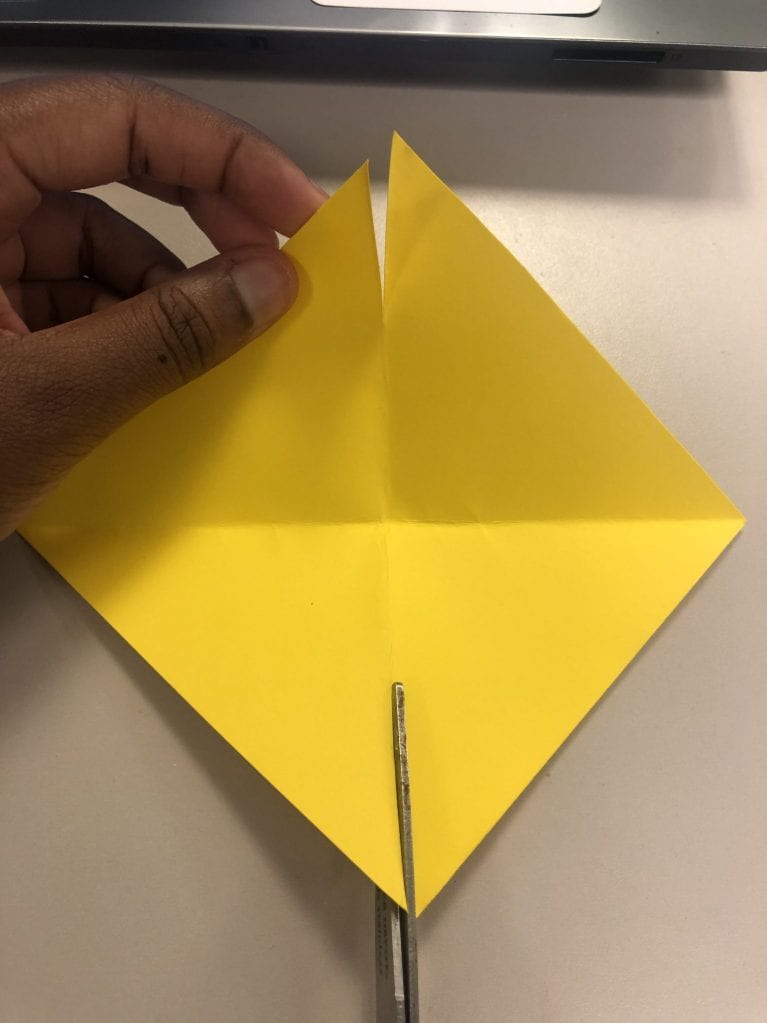
Step 4: Now you can unfold the triangle. Cut a small slit that is about 2/3 on the fold line.
Step 5: Grab the triangle and unfold it fully. You should have a square and two corners that have small cuts. Now you will repeat Steps 4 and 5 for the other corners.
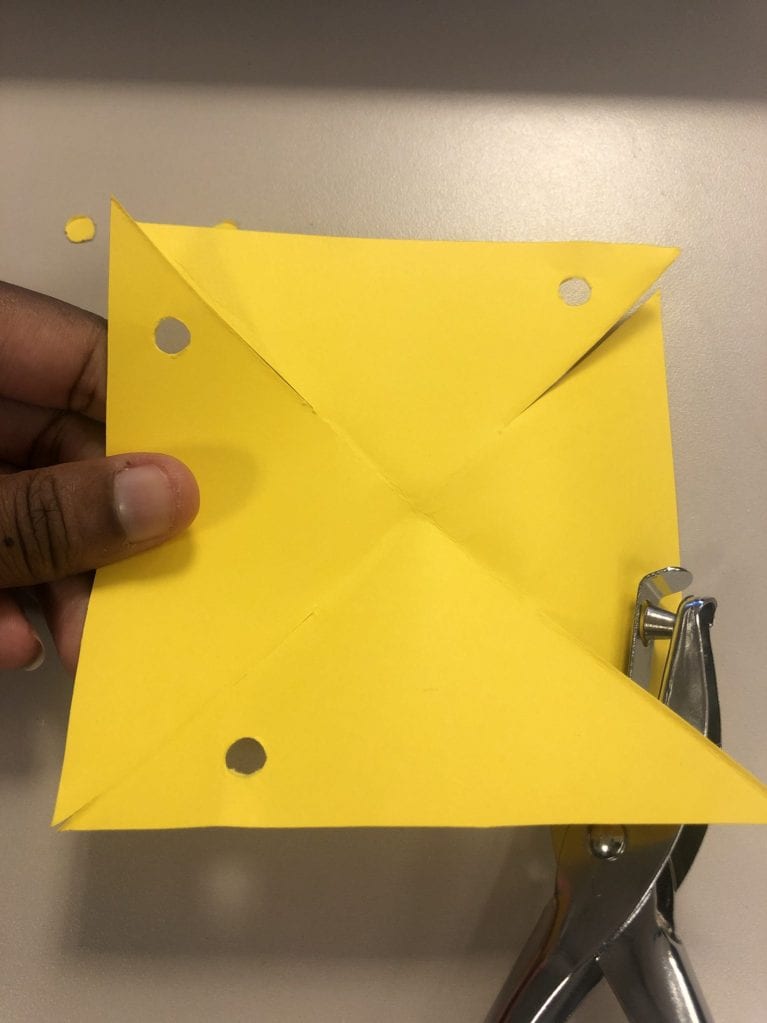
Step 6: After cutting the other corners, use the hole-puncher to create a hole on 4 of the flaps.
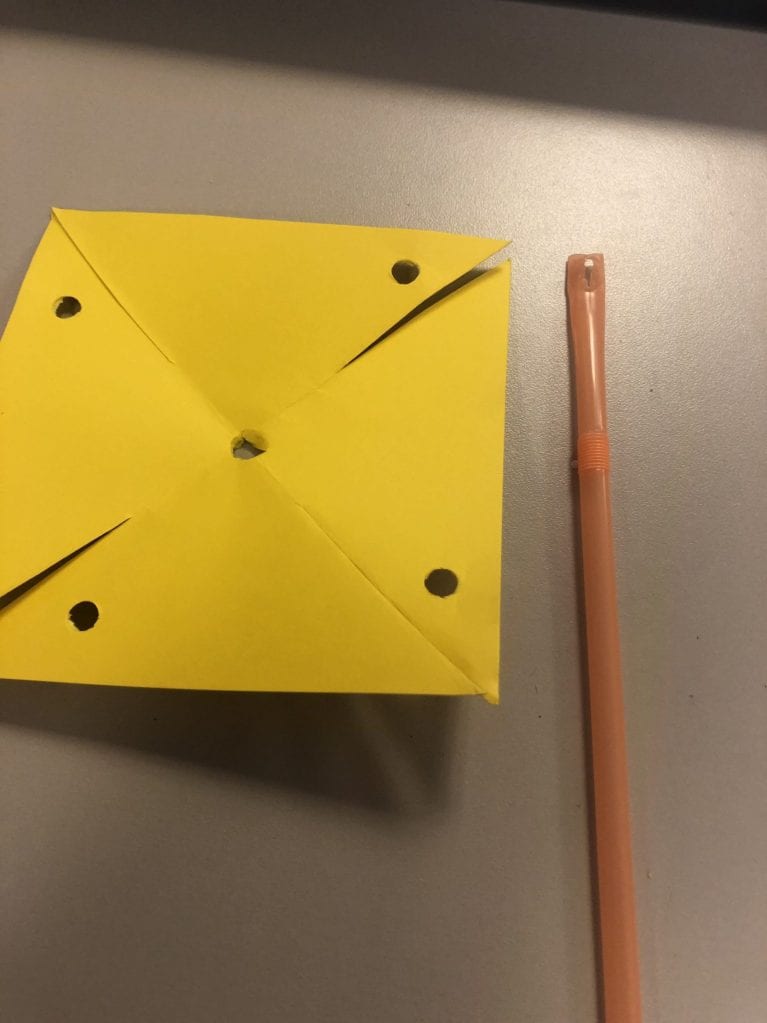
Step 7: Grab the square and create a small hole with a sharp pencil. Then slowly continue to create a bigger hole in the center.
Step 8: Puncher a small hole in the top of the straw with the scissors. With a pencil slowly make the hole the same size as the hole in the paper. Please DO NOT use your hands as the backing support when making the hole.
Step 9: Grab all sides of the flaps that have a hole in it and match the holes to the center of the square. Put a paper fastener to hold all the pieces together but DON’T close it yet.
Step 10: Grab the straw with the hole and add it to the back of the pinwheel. Now it’s time to fasten by pushing the paper pin backwards and you’re done!
SEE DAVID BUTLER’S AIRPLANE (WHIRLIGIG) IN THE PERMANENT COLLECTION AT OGDEN MUSEUM.
QUESTIONS? EMAIL EDUCATION@OGDENMUEUSM.ORG
CHECK OUT THE O BLOG FOR MORE RESOURCES!


_______________________________________________________________________
Actividad artística O-riginal: Crea un molinillo inspirándote por el Avión (trompo) de David Butler
Crea un molinillo colorido como David Butler.
Descargar ActividadDavid Butler, Airplane (Whirligig), Mixed media, 1969.
David Butler nació en Good Hope, LA en 1898 y murió en Morgan City, LA en 1997. Fue un escultor y pintor afroamericano. Su estilo está personificado por esculturas cinéticas hechas de estaño reciclado o madera, que embelleció con colores saturados y patrones geométricos. Además de incorporar creencias cristianas y prácticas populares en su obra de arte, Butler también trabajó para llevar estas creencias y prácticas a espacios físicos para crear una atmósfera de autodeterminación y protección en un mundo que a menudo era duro e impredecible.
Materiales
Papel de color, sorbetes de plástico, sujetador de papel, tijeras, lápices, perforadora sacabocado.
Instrucciones
Nota: Completa esta actividad con la ayuda de un padre o tutor, ya que algunos de los pasos involucrados necesitan la supervisión de un adulto.
Paso 1: Elige el papel de color que te gustaría utilizar para crear tu molinillo. Piensa en cómo se verían esos colores si los hicieras girar. ¿Se mezclarán los dos colores para formar un tercer color al girar? Una vez que elijas los colores, dobla una esquina del papel para formar un triángulo.
Paso 2: Toma unas tijeras y corta a lo largo de los bordes del triángulo, pero NO despliegues el triángulo después de cortarlo.
Paso 3: Después de cortar el triángulo, dóblalo por la mitad para crear una línea de pliegue. Entonces deberías tener 2 líneas de doblez.
Paso 4: Ahora puedes desplegar el triángulo. Corta una pequeña hendidura de aproximadamente 2/3 en la línea de pliegue.
Paso 5: Agarra el triángulo y desdóblalo por completo. Debes tener un cuadrado y dos esquinas que tengan pequeños cortes. Ahora repetirás los pasos 4 y 5 para las otras esquinas.
Paso 6: Después de cortar las otras esquinas, usa la perforadora para crear un agujero en 4 de las solapas.
Paso 7: Agarra el cuadrado y crea un pequeño agujero con un lápiz afilado. Luego, lentamente, continúa creando un agujero más grande en el centro.
Paso 8: Perfora un pequeño agujero en la parte superior del sorbete con las tijeras. Con un lápiz, haz lentamente el agujero del mismo tamaño que el agujero en el papel. Por favor, NO uses tus manos como soporte de respaldo al hacer el agujero.
Paso 9: Agarra todos los lados de las solapas que tengan un agujero y haz coincidir los agujeros con el centro del cuadrado. Coloca un sujetador de papel para mantener todas las piezas juntas, pero NO lo cierres todavía.
Paso 10: Agarra el sorbete con el agujero y agrégala a la parte posterior del molinillo. ¡Ahora es el momento de sujetar empujando el alfiler de papel hacia atrás y listo!
CONOCE MÁS DE AVIÓN (TROMPO) DE DAVID BUTLER EN LA COLECCIÓN PERMANENTE DEL MUSEO OGDEN.
¡VISITA THE O BLOG PARA MÁS RECURSOS!
¿PREGUNTAS? ENVÍA UN EMAIL A EDUCATION@OGDENMUEUSM.ORG.
Translation by Agostina Coll